- Get access to Kumo from the Snowflake Marketplace
- Install Kumo
- Setup Kumo (create necessary databases, roles, network rules, and privileges for Kumo)
- Launch and start using Kumo!
1. Get access to the Kumo Native app
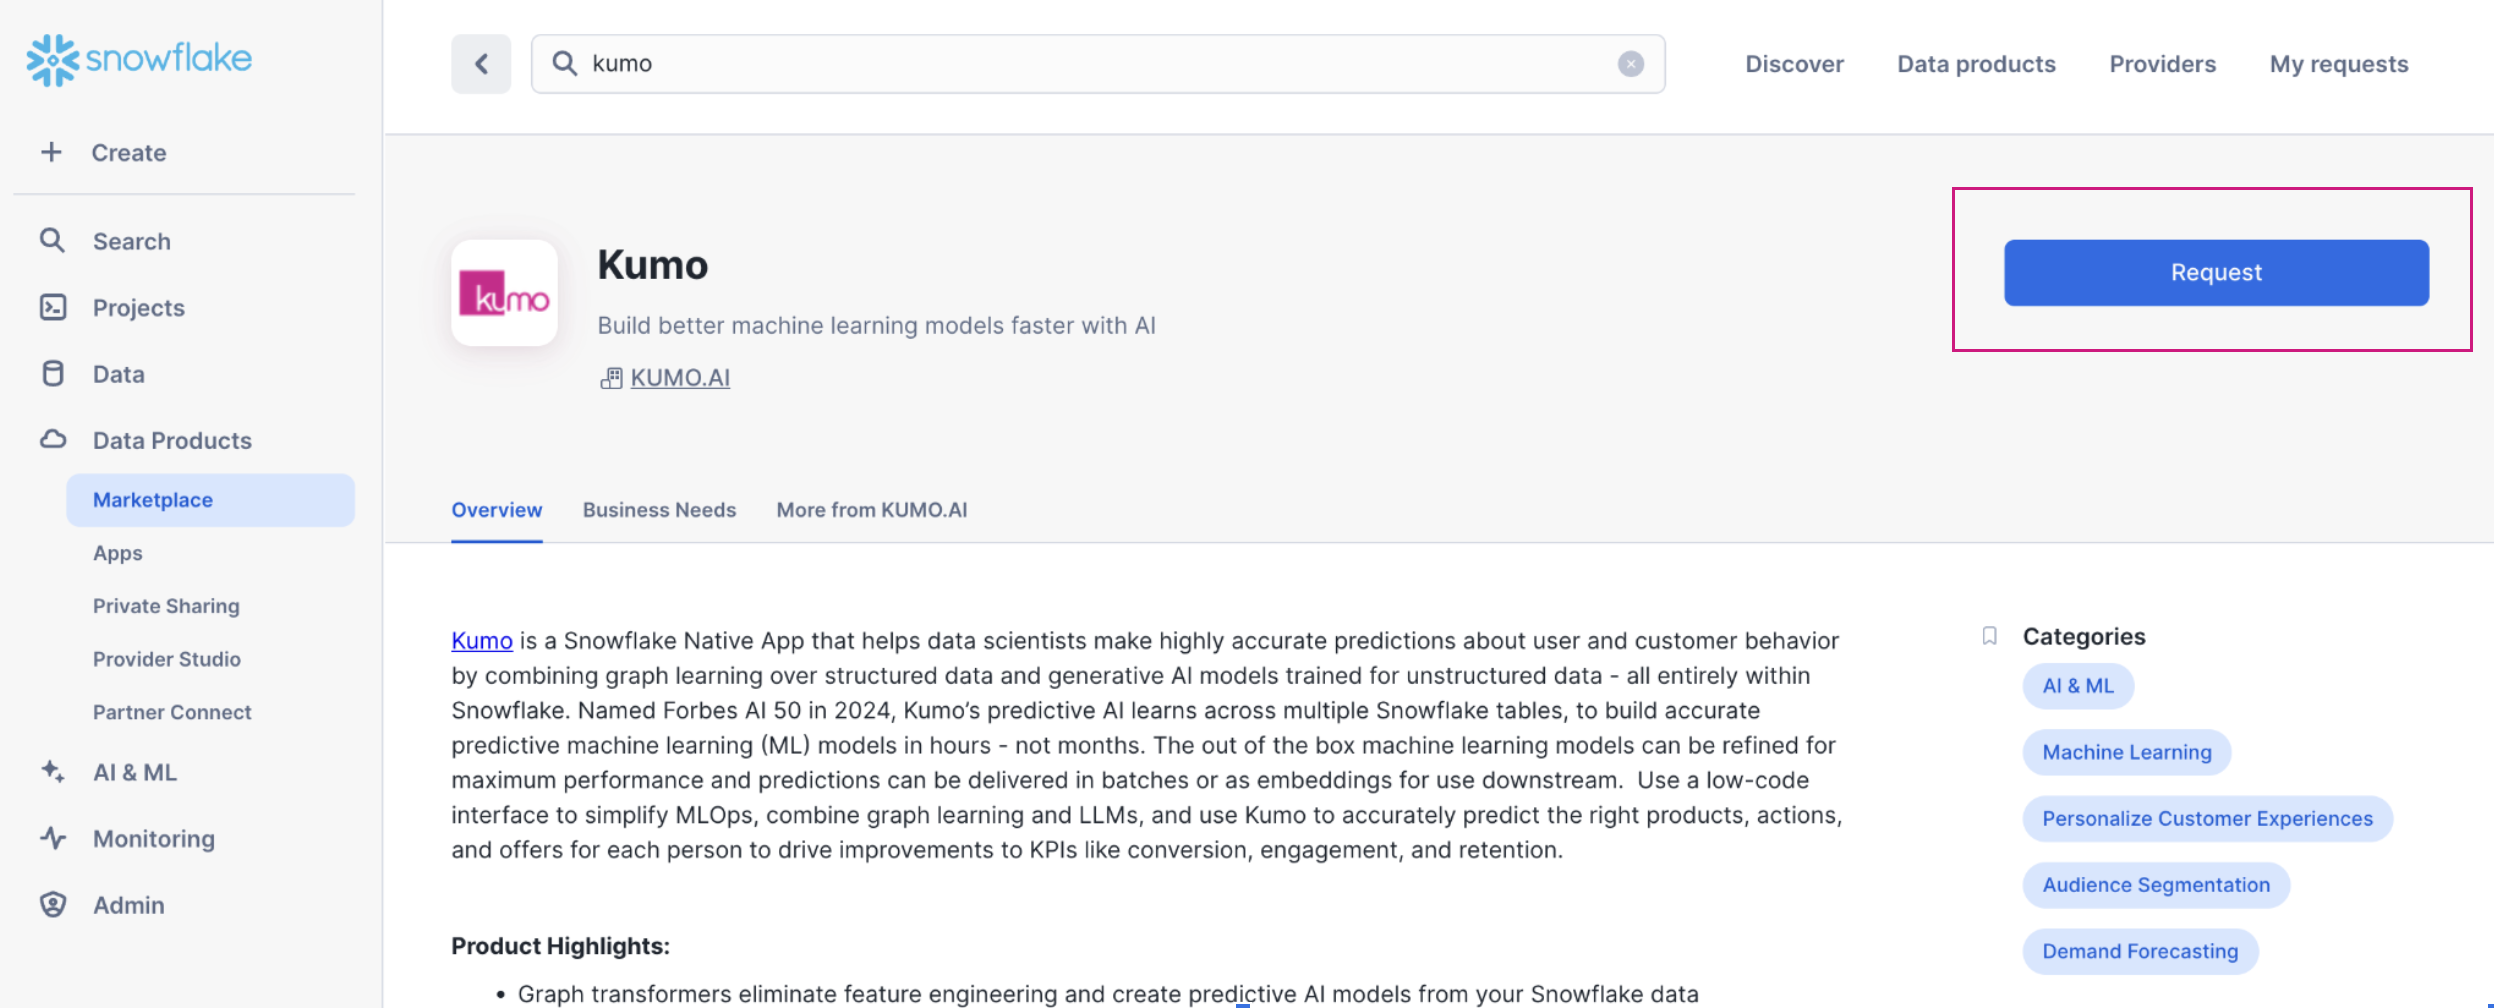
Customers can access the Kumo Native app through the Enterprise Access listing in Snowflake Marketplace.Enterprise Access
Use this listing if you are actively working with Kumo account representatives for a proof of concept or are already under contract. To do this, click the Get button, and then select Request.Note that the user requesting the app must haveACCOUNTADMINrole or a role withIMPORT SHAREandCREATE DATABASEprivileges
2. Install Kumo
Prerequisites
Before installing and configuring Kumo as a native Snowflake application, ensure that you have completed the following:- Accept the Consumer terms of service for Snowflake marketplace. This needs to be done by a user with an ORGADMIN role.
- Accept terms of service to enable third party python packages. This needs to be done by a user with an ORGADMIN role.
- An account-level event table is configured. This can be verified by running
SHOW PARAMETERS LIKE 'event_table' IN ACCOUNT. If an event table is not configured, follow the steps to create an event table and associate it with your account. - If Private link is enabled on your Snowflake account, ensure that it is configured for Snowpark Container Services. See using Kumo with private link below for more details.
- If SSO is configured for your Snowflake account, it must be using SAML2 and not legacy SAML (see Migrating to SAML2 in Snowflake documentation).
Install the Kumo Native App
Note that the following steps can only be done using theACCOUNTADMIN role or by a user/role with the appropriate privileges
- You should see Kumo shared with you when navigating to “Data Products” → “Apps” in SnowSight. Click the
Getbutton.
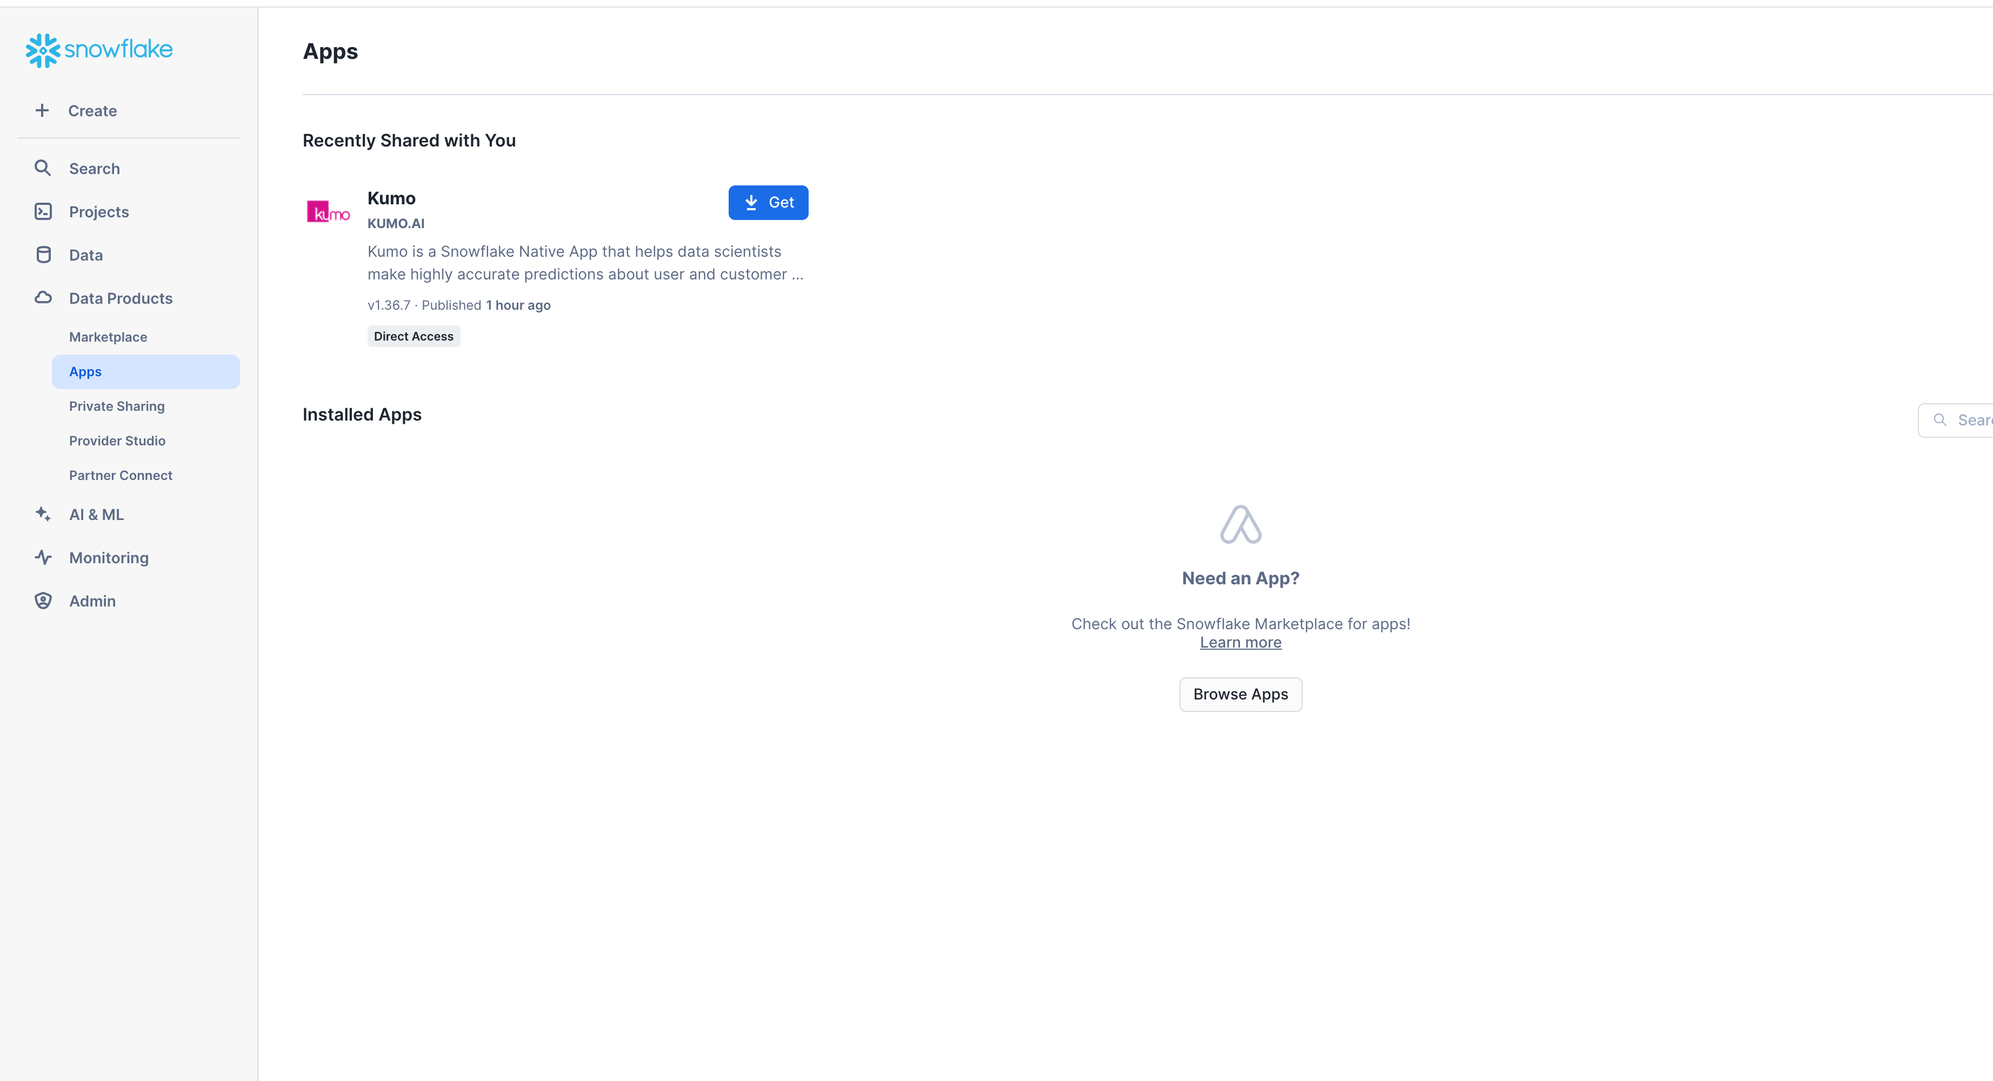
- Choose a warehouse to download the app and click
Getin the next prompt. This warehouse is used to only install the app.

- The app will start installing and take 2-5 mins to complete.
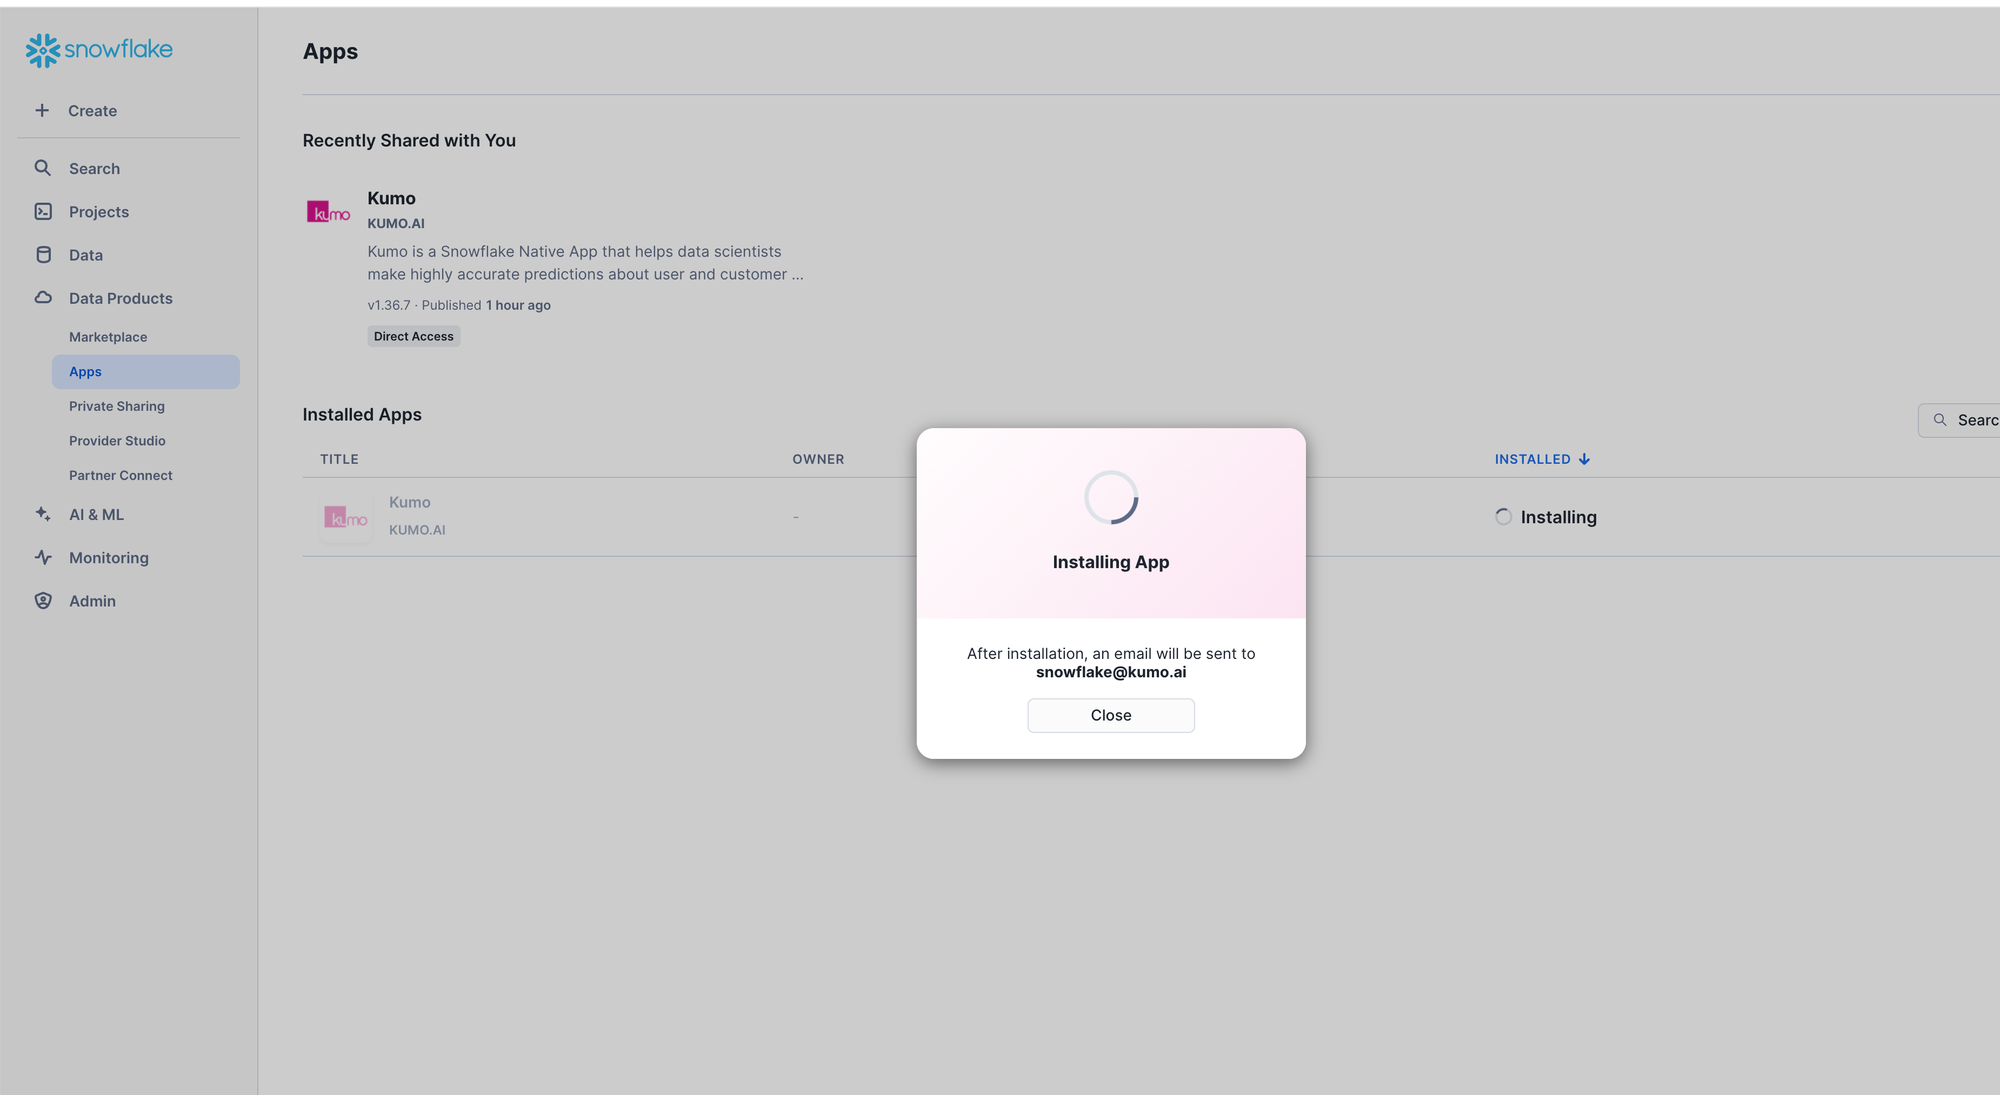
- Once the installation is completed, click on Done and setup Kumo using the instructions in the next section.

3. Setting up the Kumo Native app
The Kumo Native app needs to be installed/set up by a Snowflake account administrator or a user who hasACCOUNTADMIN privileges on the account. It can be set up either using (a) Snowsight or (b) SQL (preferable for automation), as described next.
Setup using Snowsight
Kumo can be set up using Snowsight using the following steps:- Click “Grant” to grant the required privileges to the app.
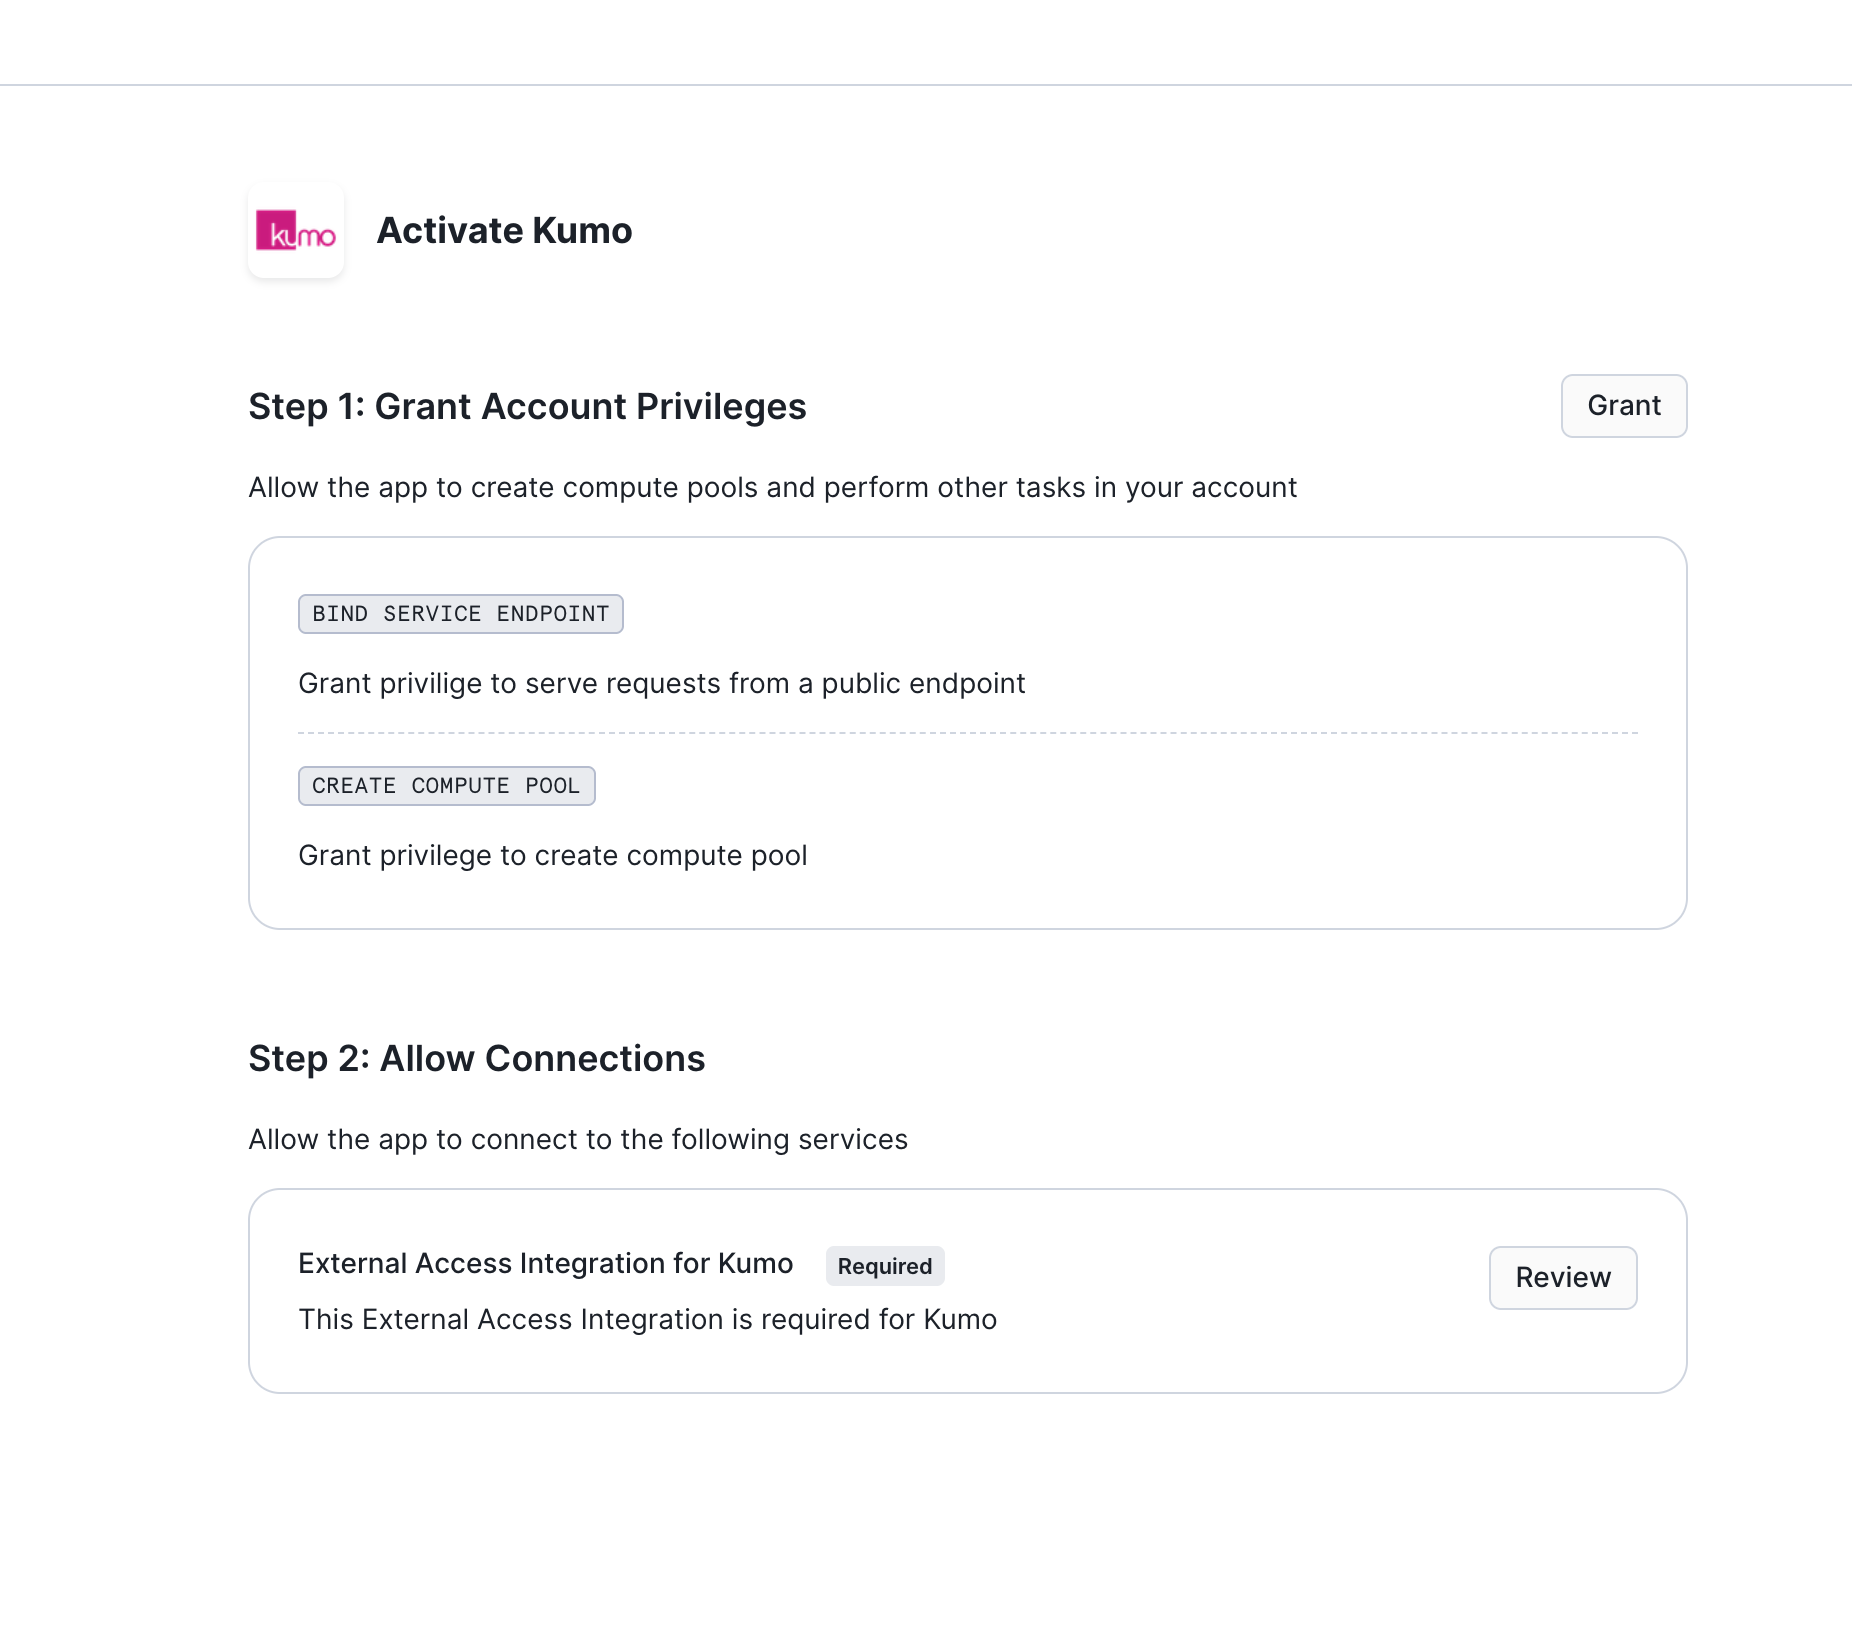
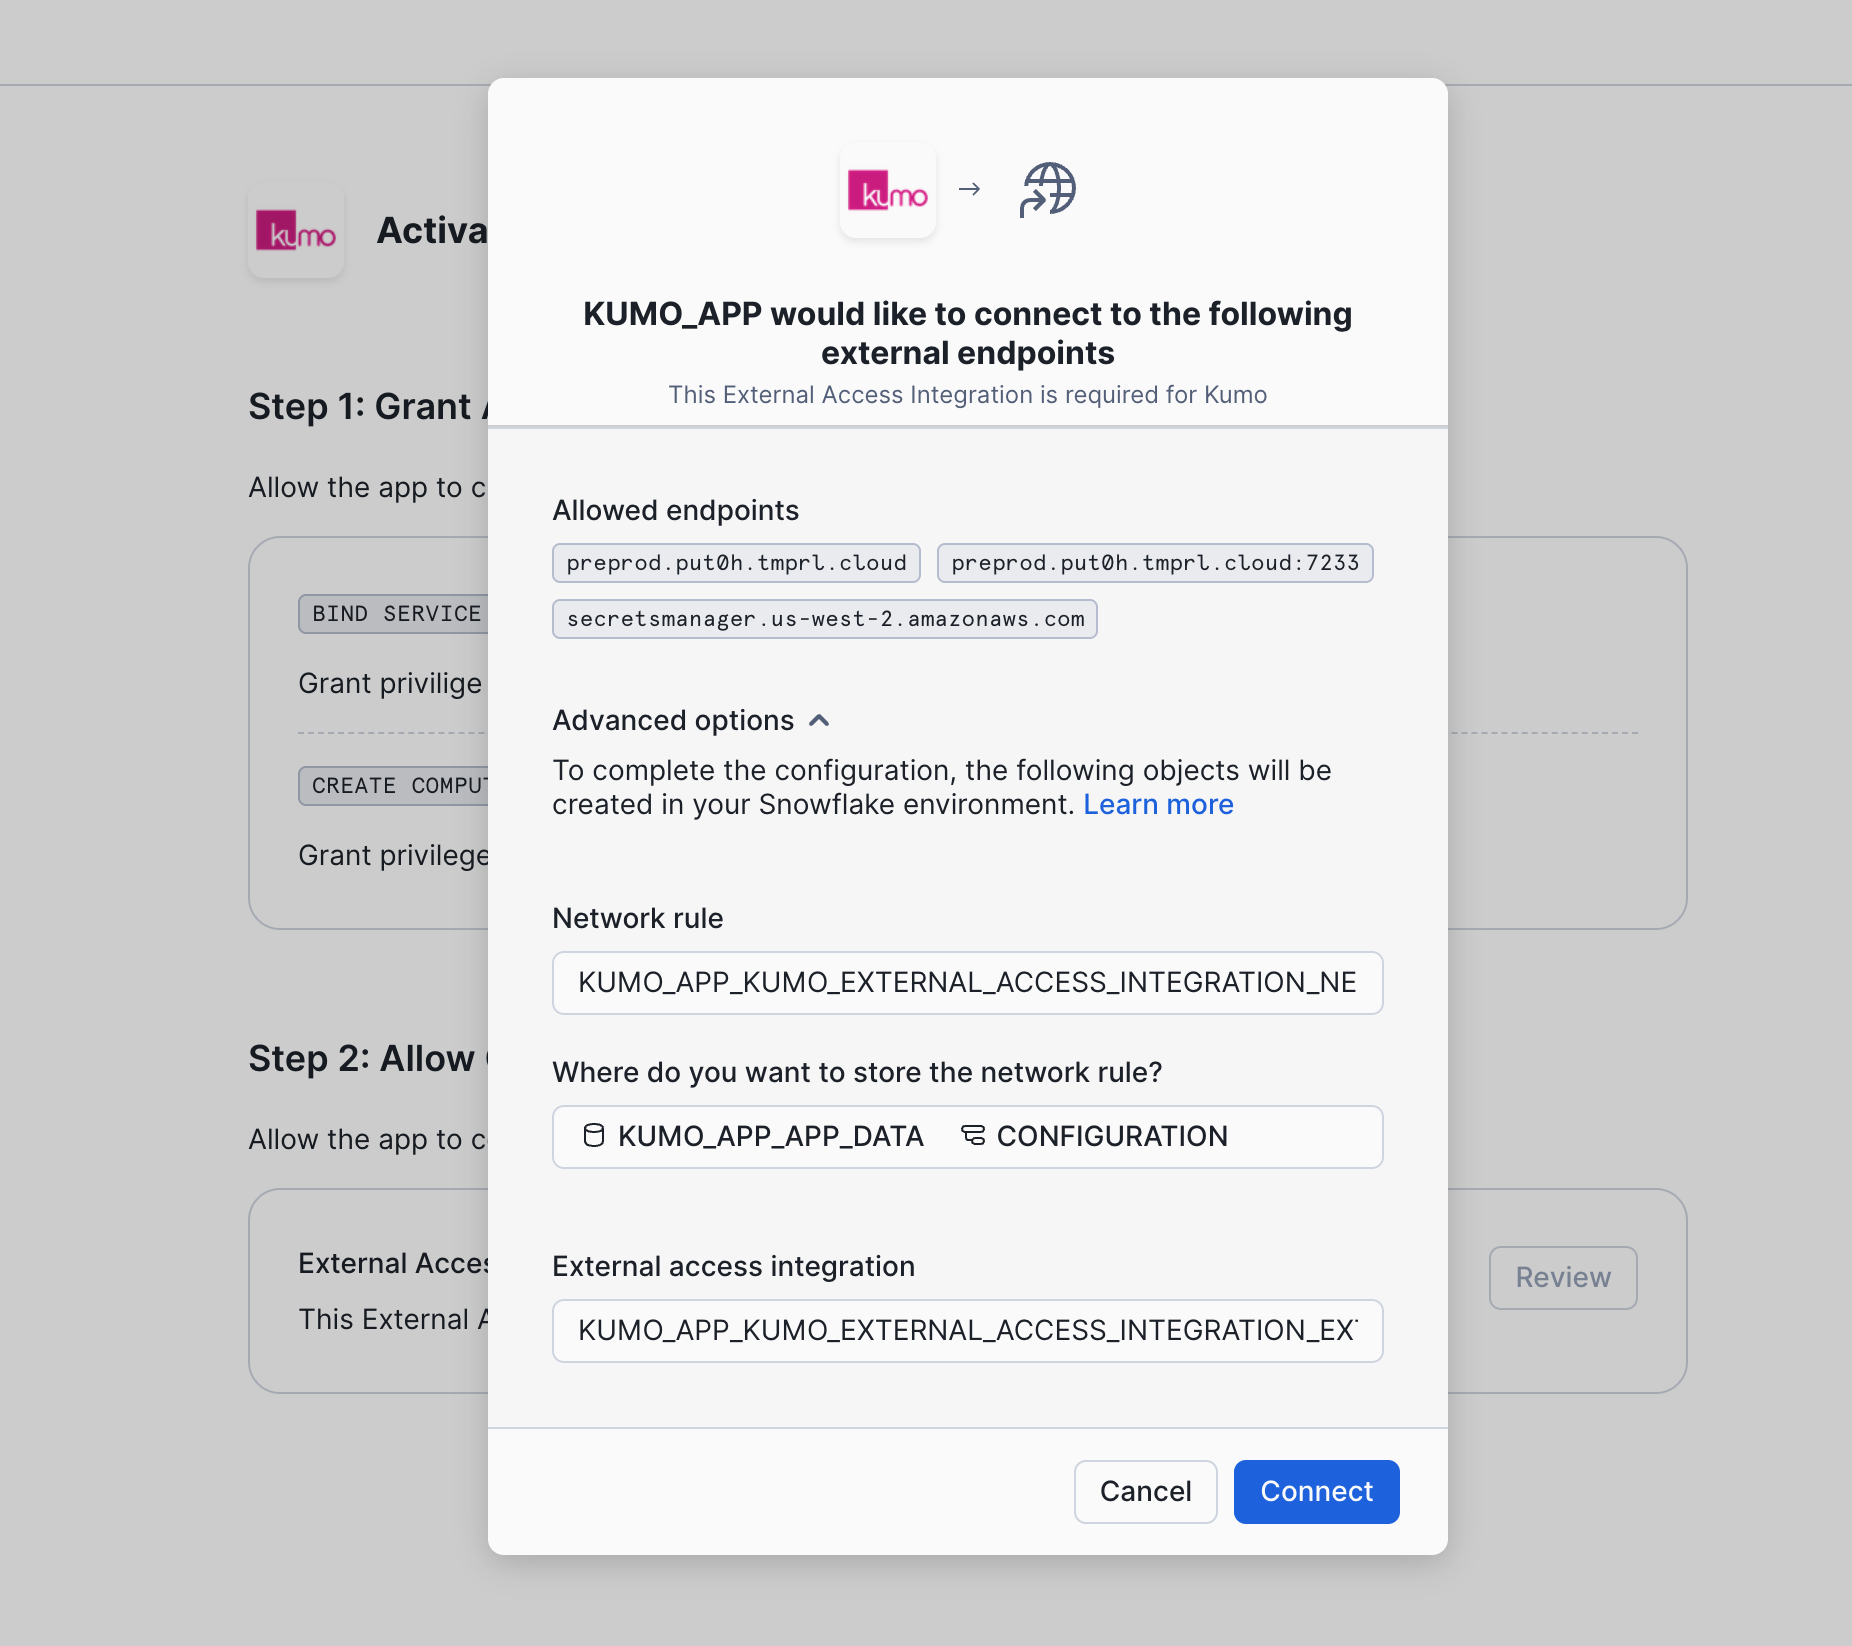
- Click “Review” and “Connect” to create the external access integrations required for Kumo.
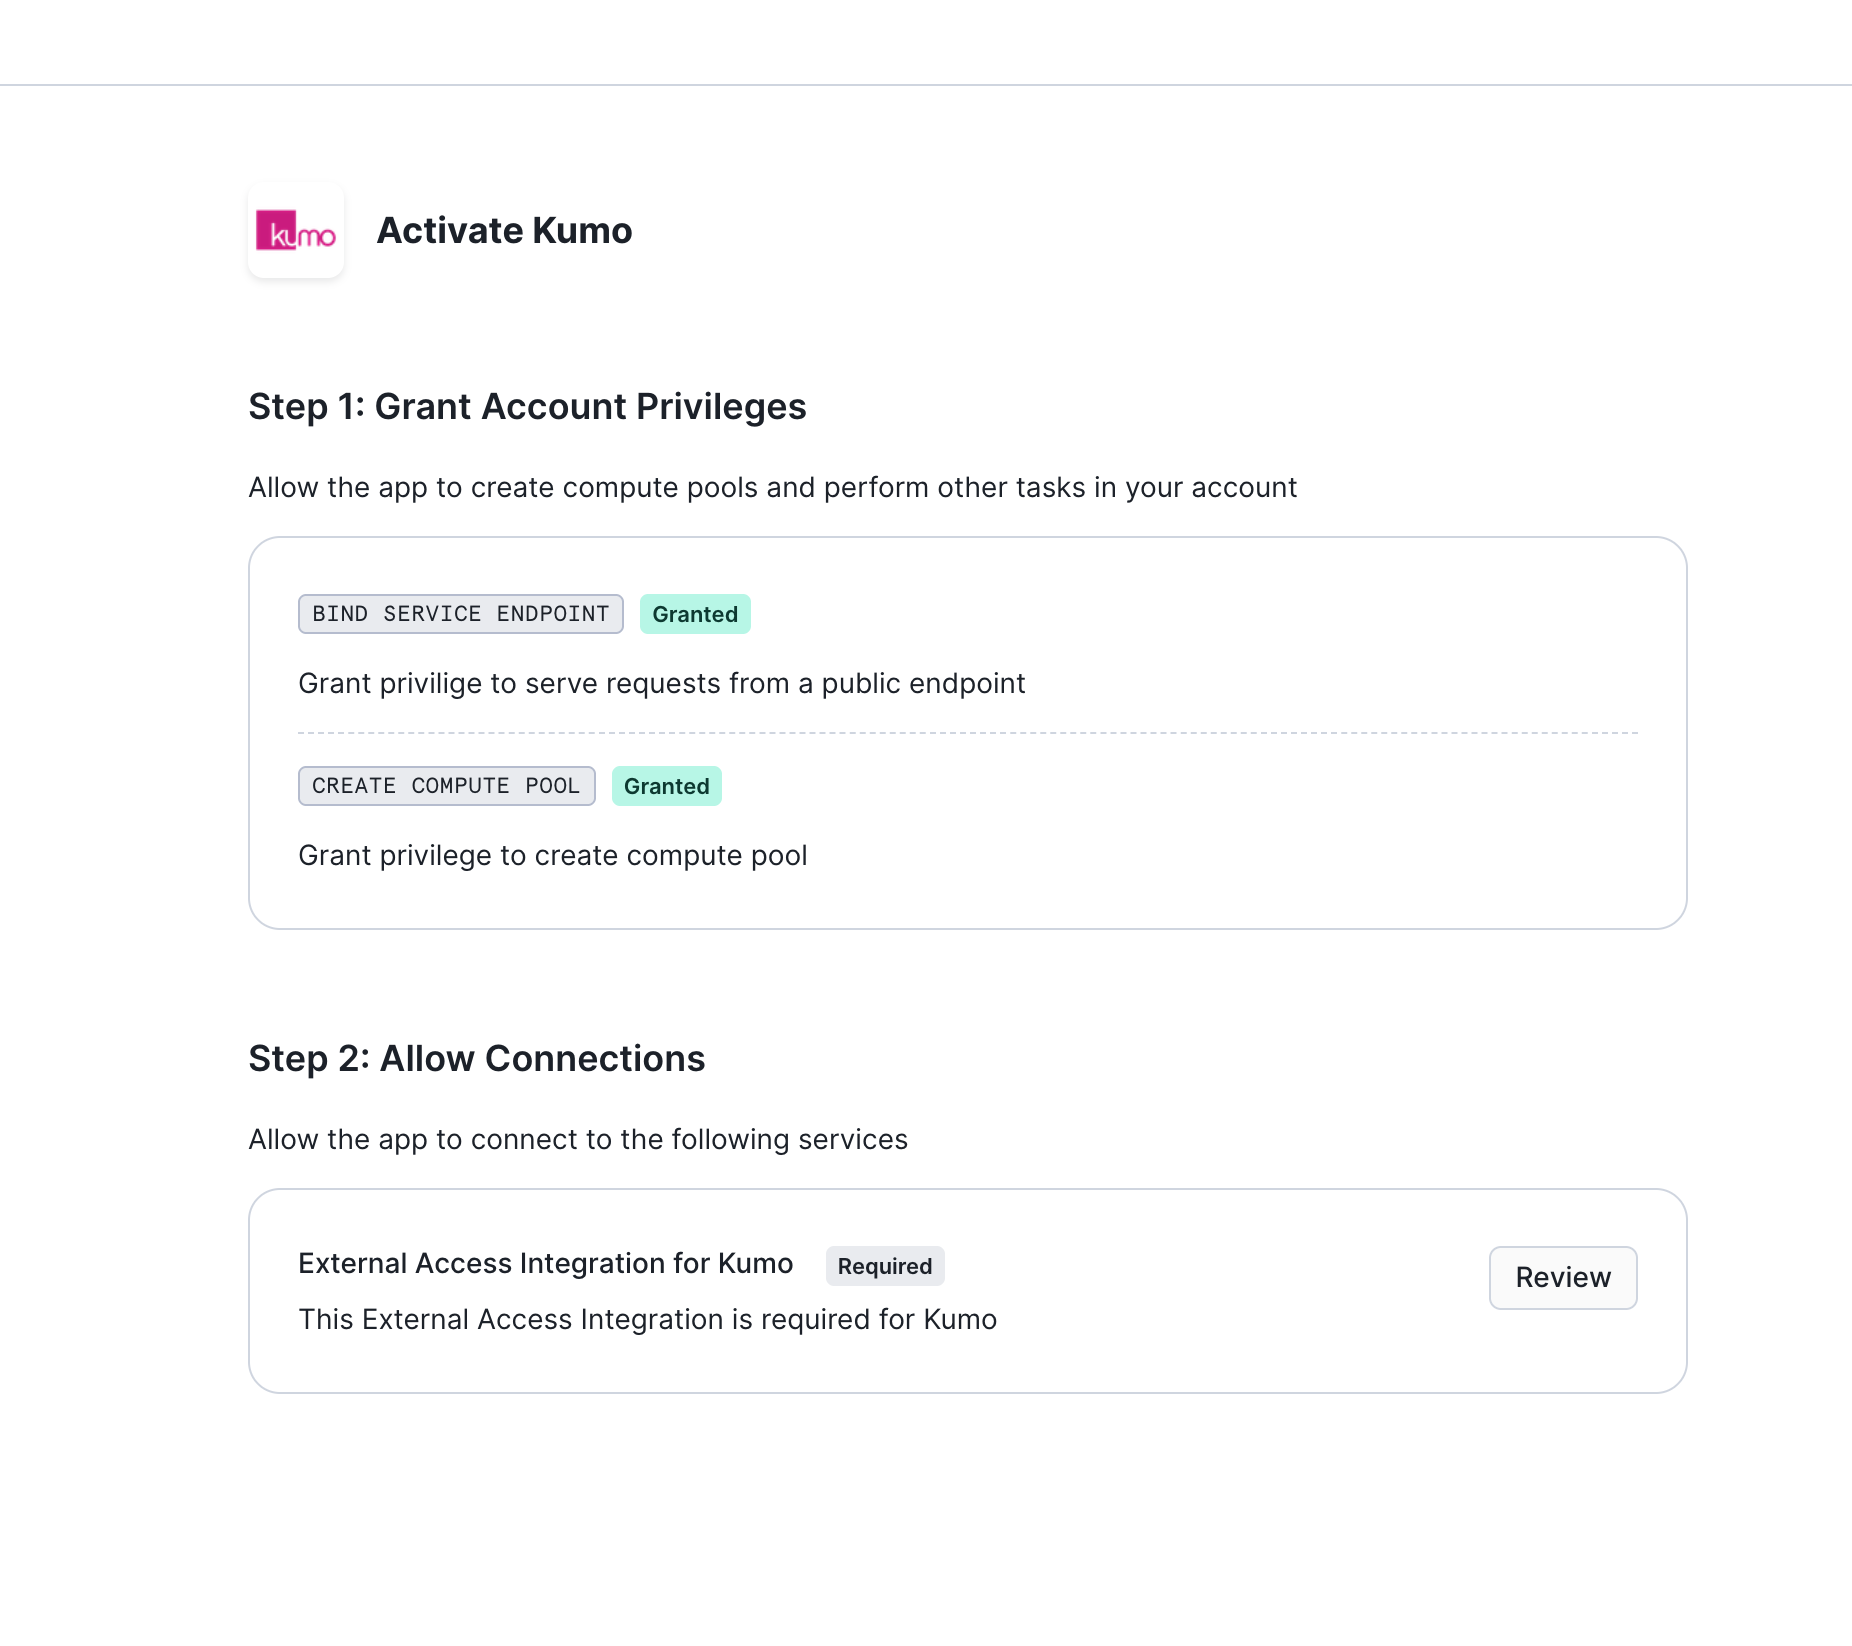
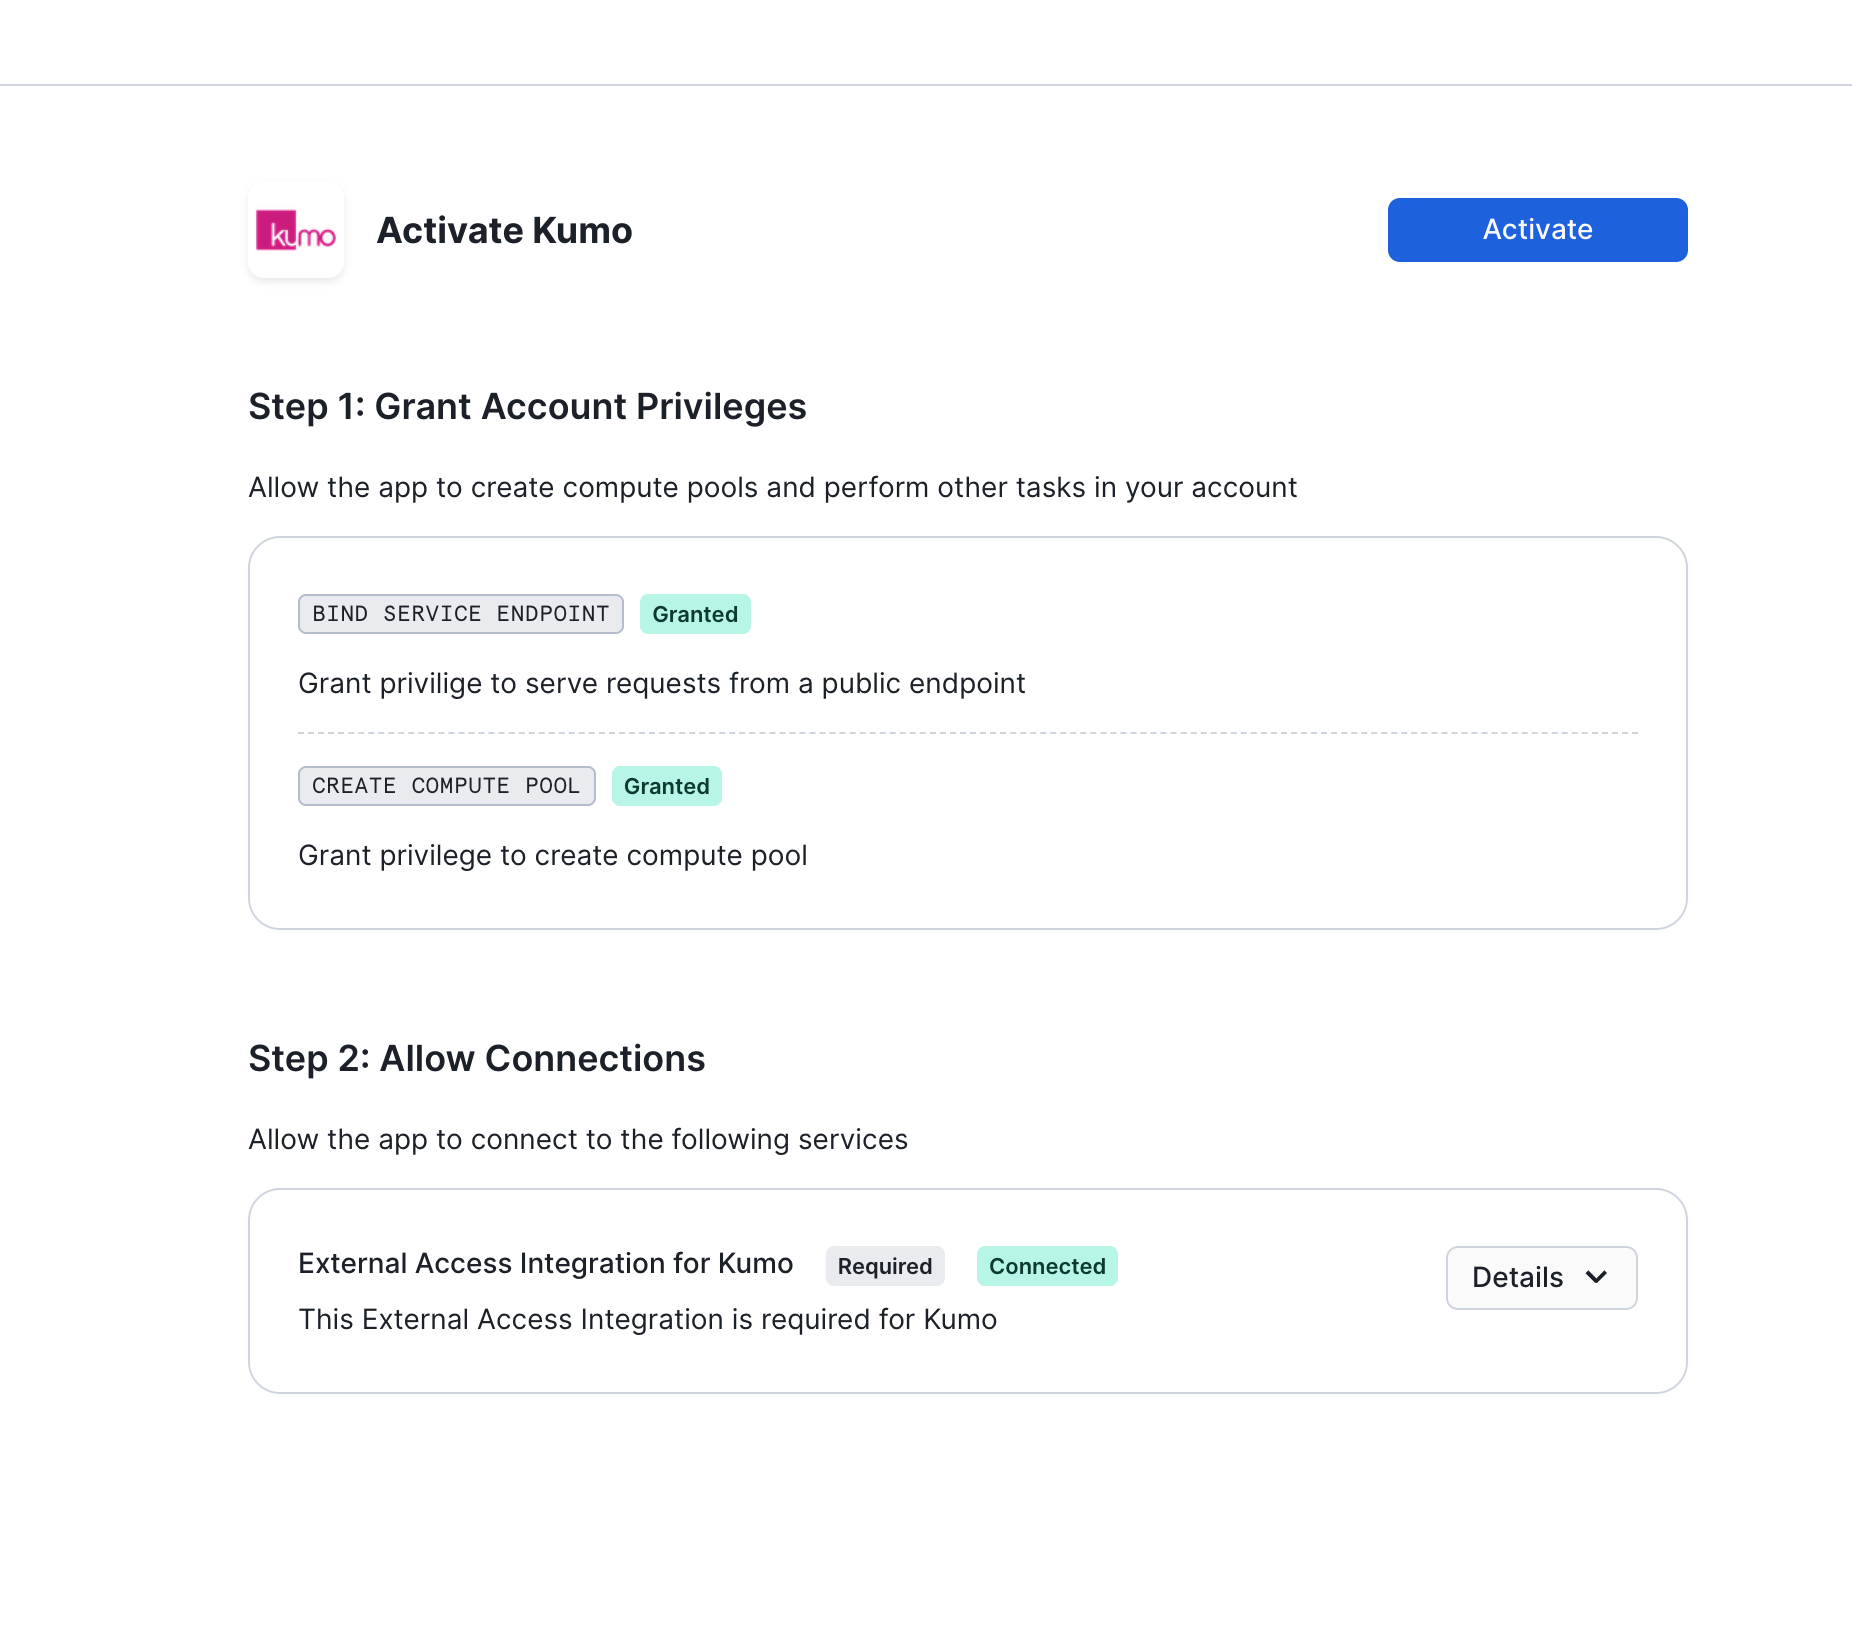
- Click “Activate” to start the Kumo app. This step can take 20 to 30 mins.
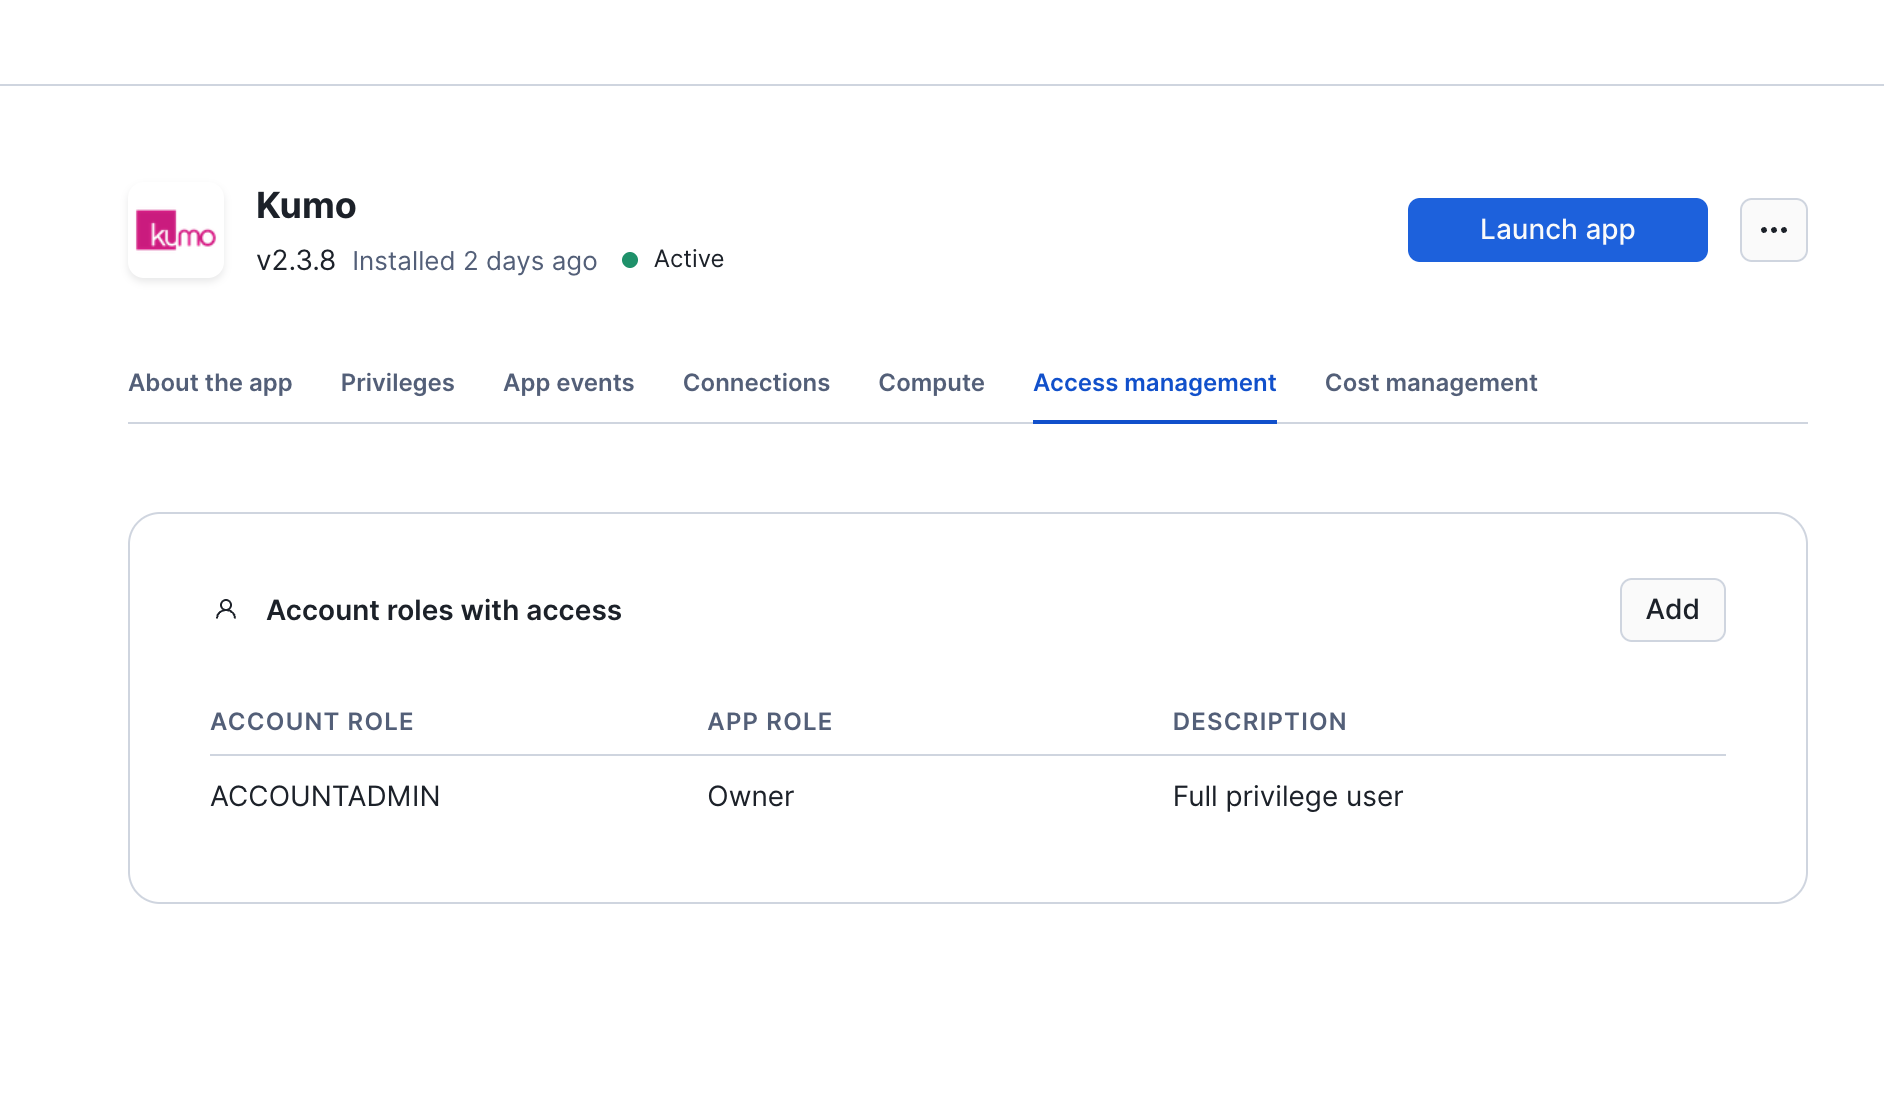
- Navigate to the “Access management” tab on the application and click “Add” to grant access to users who will be using the app.
Setup using SQL
Create required objects and roles
The following SQL script creates the databases, roles, network rules and privileges required to setup Kumo in your account. It uses theACCOUNTADMIN role and a user with that role should execute it.
- You are required to provide the warehouse name. Note that
ACCOUNTADMINmust haveUSAGEprivilege on the warehouse provided. - Set the name of the Kumo Native app if a different name was used when the app was installed from the marketplace. The app name defaults to
KUMO.
Grant user(s) privilege to use Kumo
The Snowflake administrator can provide access to the Kumo app to other users with the following commands. Modify<DEFAULT_USER_ROLE> to the role used by the user to start and use Kumo.
4. Launch and Use Kumo
This can be done by any user who has been granted access to the Kumo app (access can be granted using the steps above with sql or Snowsight).Using Snowsight
- Navigate to the app from “Data products” -> “Apps” -> “Kumo” and click on “Activate”. This step can take 20 to 30mins.
- Once the activation is complete, you can access Kumo by clicking the “Launch” button. You will be re-directed to a URL where you can login with your snowflake credentials.

Using SQL
- Launch the Kumo app using the following commands. Note that
KUMO_USER_ROLEshould have privileges to use the warehouse provided in the command below.
- Navigate to the URL from the above command in your preferred browser. Login using your Snowflake credentials and you will see the Kumo UI.

Using Kumo with Private Link
When private link is enabled on your Snowflake account, accessing the Kumo Native app requires you to configure private connectivity to SPCS as described in Snowflake’s SPCS PrivateLink Connectivity documentation. You will be required to perform the “Configure Public Endpoints Access” steps in the docs to enable ingress requests from your network to the service’s public endpoint. We recommend having your IT/networking team confirm that the PrivateLink endpoints under *.privatelink.snowflakecomputing.com are resolvable and accessible from your environment. This may require adding or updating DNS records (e.g., CNAME entries) so that the hostname resolves correctly. Split Tunneling VPN Configurations - Some customers have VPN configurations that use split tunneling. In these cases, make sure to include both *snowflakecomputing.app and *snowflakecomputing.com in your allowlists. After launching the app using Snowsight or SQL as described above, you will need to run the following commands to retrieve the private link URL that can be used to access Kumo.Using Kumo
For guidelines on how to use Kumo, visit the Kumo Quick Start Guide.Managing the Kumo app
The following steps can be used to manage the lifecycle of the Kumo Native app. Users can invoke these based on the specific operations they need to perform.Shutting down Kumo
You can stop the Kumo application using the following command when you are not actively using the application.START_APP procedure above. Note that restarting the Kumo app will generate a new url to access it.
Updating Kumo
If the Kumo app is running and needs to be updated (to get the latest version of Kumo published), you can run the following:SHUTDOWN_APP and START_APP above.
Retrieving the Kumo access URL
The URL to access the Kumo native app once it is started can be retrieved using the following:Appendix
Deleting the Kumo Native app
You can reset your account and remove all objects associated with Kumo using the following script. Note that this will permanently delete all metadata, data and models trained with the Kumo Native app and this cannot be reverted. Please reach out to Kumo support if you have any questions regarding the deletion of your Kumo app.Enabling mandatory event sharing for Kumo
Be sure to shareALL events from the native app so that Kumo can provide any necessary operational support—this is required when using Kumo’s Snowflake native app. You can examine the logs and events shared with Kumo using the event table configured for your account. See Snowflake’s documentation for more details about event sharing.
Instructions to configure event sharing is below. Note that in both cases an event table must be configured for your Snowflake account. See Setting up an event table for details.
Configuring an existing Kumo Native App
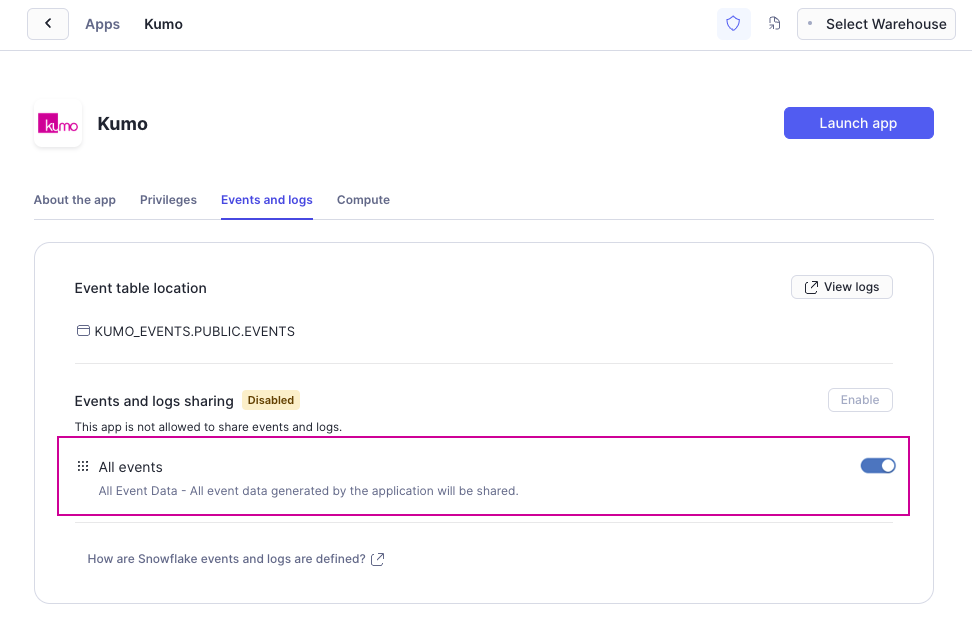
Using Snowsight: If you have an existing Kumo app installation, you can easily enable mandatory events in Snowsight by going toData Products -> Apps -> Kumo -> Events and Logs. On the Events and Logstab, toggle the All events button in the Events and logs sharing section.
Configuring a New Kumo installation
All mandatory events will be enabled by default when installing Kumo. You will be notified of this when attempting to install the Kumo app. Note that an event table must be configured for your account to ensure installation can proceed.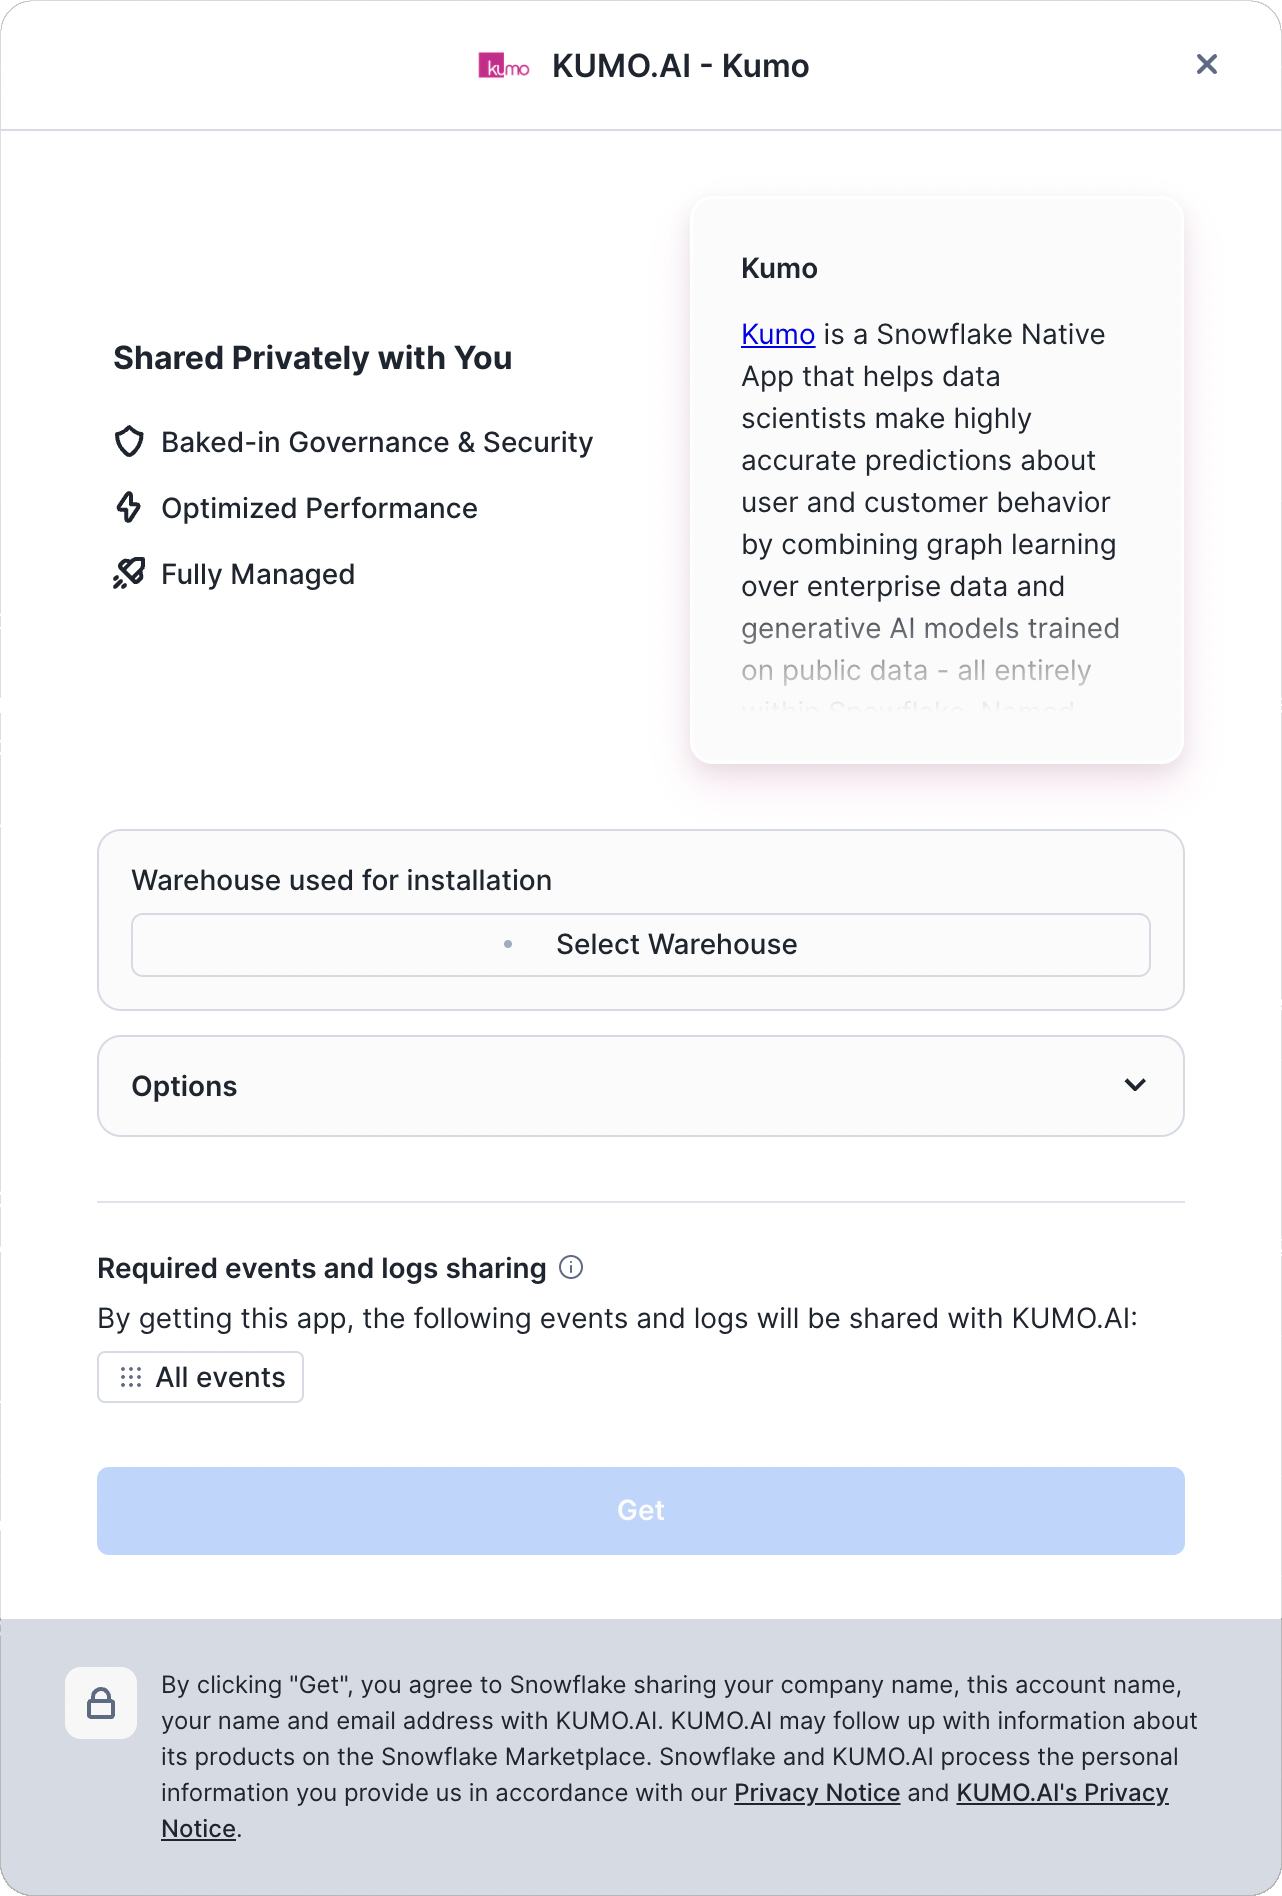
Using Kumo without granting CREATE COMPUTE POOL privileges
We strongly recommend granting theCREATE COMPUTE POOL privilege to the Kumo native app as described above. This allows the app to intelligently manage the required compute pools — for example, as the Kumo platform evolves, we will change the types of compute pools used to building models in a cost-efficient manner. To control costs, usage limits can be set on the native app using Snowflake budgets.
However, if you intend to manage the compute pools yourself, the Kumo application can be started using the following commands instead of the commands in Step 4 above. The setup depends on the underlying cloud platform where your Snowflake account is hosted - follow the respective instructions from below.
For legacy Kumo users (onboarded before June 2025), who use a single GPU compute pool on AWS, see instructions below.